
As a developer, I often overlook what infrastructure changes are involved in a setting up a production website. As a user of free services like FreeDNS / DynDNS, I had never even registered a domain.
Over the past few days, that changed. In deciding to create this blog, I settled on WordPress. Getting WordPress set-up and running through Microsoft’s Web Platform installer was actually pretty easy. However, I soon discovered that it was lacking.
WebPI installs WordPress through WebMatrix. WebMatrix in turn utilizes IIS Express. IIS Express, by default, is not remotely accessible. Additionally, out of the box, the installer only works with MySQL connections.
Installing software isn’t inherently hard. I popped out of the WebPI installer, installed MySQL, MySQL Workbench, and then returned to WebPI to get WordPress installed. A “please wait” messages later, I had a full working WordPress site.
The IIS Express problem reared its head again.
I set up our router to forward web traffic, but no matter what, I got no response. I tried different ports without any luck. That’s when I remembered the limitations of IIS Express. Fortunately, simply copying WebMatrix’s WordPress config files over was a simple solution to get WordPress working on IIS. I did have to make a few more round trips to WebPI to get PHP installed and working with IIS, but that was pretty minor.
Next up, I soon discovered something interesting about Dynamic DNS services. First, you don’t own the domain. Second, whatever “domain” they give you is actually a sub-domain. No big deal right? Well, it’s a big deal if you want to utilize HTTPS with an SSL/TLS certificate. This was all new to me.
How did I discover this by the way? I went to a few certificate authoring sites and simply could not get a certificate once they wanted to do domain verification to ensure that I owned the domain.
That leads to my next step. Domain Name purchasing. I searched quite a bit at different providers. GoDaddy came up initially and had some good deals. You could get a *.com address for only $0.99 for one year. But, throw in private “whois” security and that bumped the cost to $8.99 for the first year. That was the first year enticement. Subsequent years w/ private information protection were closer to $20/year. That seemed pretty high. I looked around a bit more and found that most service providers wanted, on average, about $15 per year. With some of those, I couldn’t confirm if they offered privacy protections for personal information.
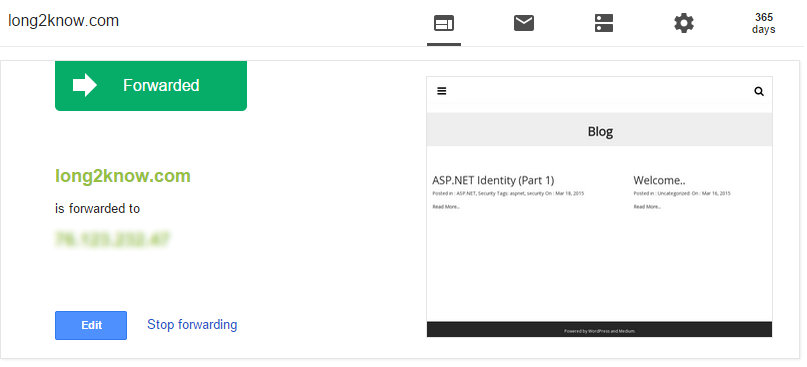
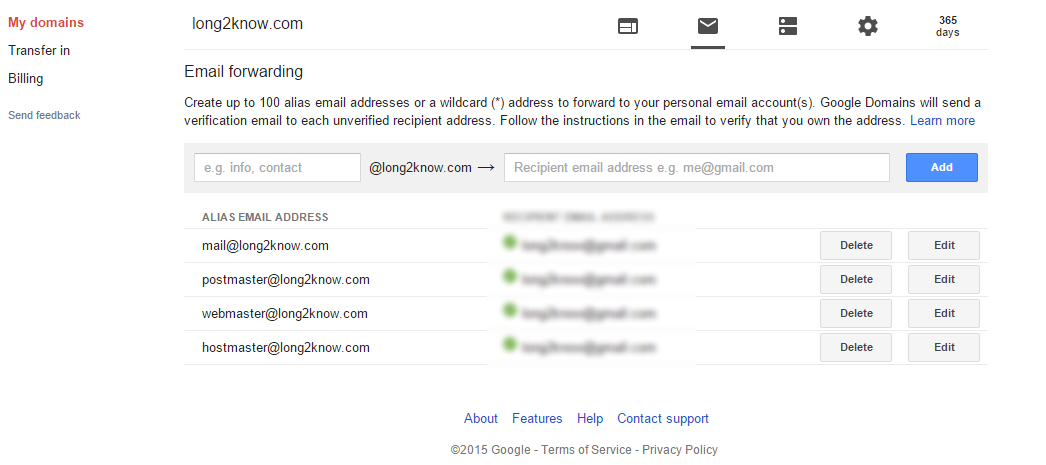
Somehow, I stumbled upon Google’s domain registration. I didn’t realize they even offered domain name registration, but I found they offered a good deal. For a $12/year flat fee, you get privacy protection, tons of forwarding options (DNS registration), and other features. Back to the certificate problem, most domain validation will rely on “whois” information or expect an email on the owner’s domain to send a verification email. Without your own mail server, this isn’t possible and I didn’t want to setup a mail server. However, Google’s setup lets you forward any emails coming in on the domain you have registered to any verified email address that you want. Score.
Here are just a few screen shots of their interface. As usually, Google’s interfaces are simple, intuitive, and work well. It was especially helpful that they immediately show a screen capture of the site to which the domain is being forward. It immediately confirmed that my site was accessible.
After getting all of the domain stuff configured, I could then go back to getting HTTPS (from here forth, I may refer to this as SSL.. even though it’s technically TLS encryption).
I looked into free providers. One that I stumbled across that worked well, and is completely free is StartSSL. Their process was actually pretty easy. You download a cert into your browser to verify your identity, then use their tools to validate email, validate ownership of the domain (remember the Google mail forwarding), create the key, and finally create the cert. If you’re using IIS, you can you use StartSSL’s tools to decrypt the key, and generate a PFX (*.p12) certificate for IIS. Installing the cert in IIS is pretty straight forward. Here’s a handy how-to: Install StartSSL Cert with IIS.
After all the setup, I simply had to go into WordPress and set the site URL’s to point to my shiny new domain using the HTTPS protocol. Voila!