
Microsoft’s guidance, in regards to deploying .NET Core applications to IIS, is a bit lacking. Throw in a continuous integration tool, like Team City, and it becomes a bit of trial and error to get a .NET Core app deployed to an IIS hosted instance.
Ideally, it would be really nice to be able to deploy to IIS using msdeploy. The current tooling for Dotnet Core doesn’t directly support this, though. But, we can get around this a bit with MSBuild.
My first issue was that I was trying to run this sequence to get an output and then call msdeploy with the files generated:
dotnet restore
dotnet build
dotnet publish
Within Team City, I configured these build steps using the .NET Core runner.
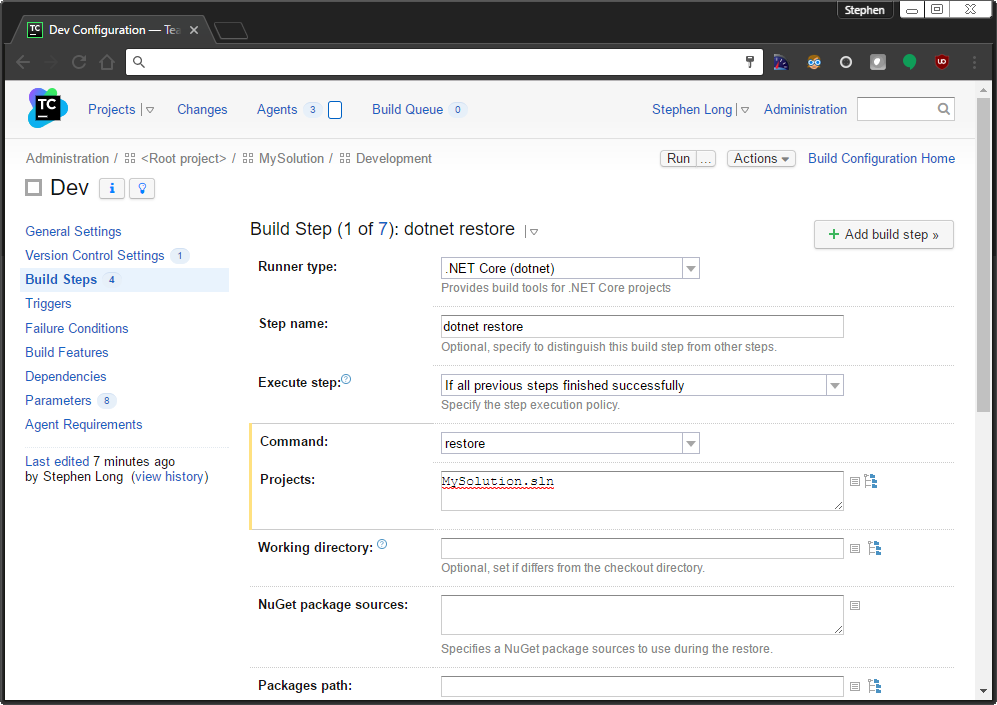
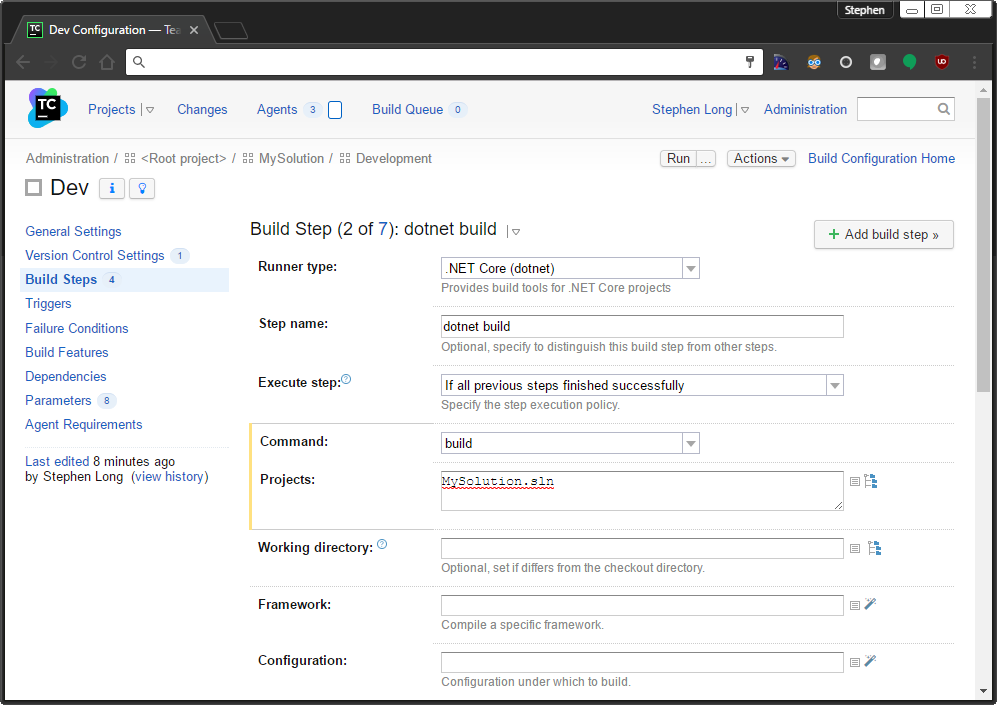
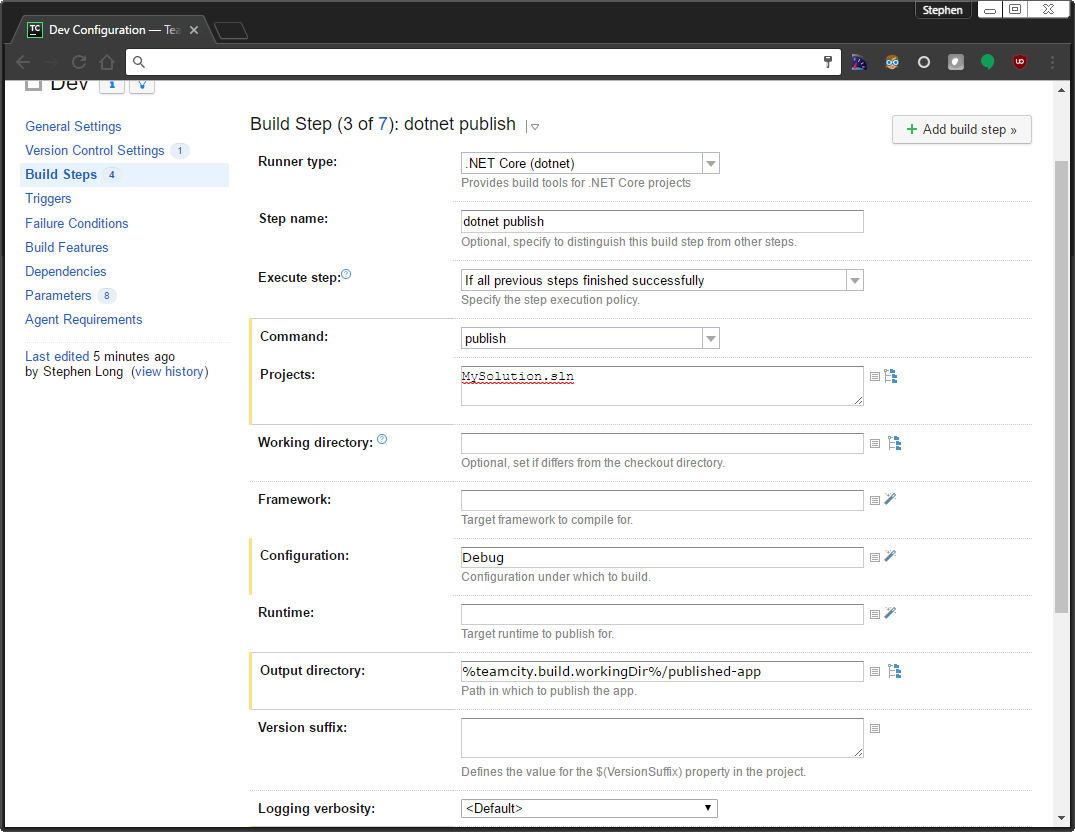
You can see that all of these build steps are pretty straight-forward. The only thing unique is that I specify an output path for the dotnet publish. This is where things become more difficult, though.
I attempted deploying the content folder using msdeploy. Regardless of the combination of switches, I couldn’t seem to get it to work. This lead me to thinking that having all of the output in a single folder was the issue. Typically, for most other deployments using WebDeploy, the output is packaged as a single zip file. The “dotnet” command line utilities do not support this packaging.
I took a step back and removed my build/publish steps and fell back to using msbuild directly. I knew that it could package the the output to a single zip. However, it did require creating a publish profile in Visual Studio.
Using the “Publish Wizard” in Visual Studio, I added a Publish Profile and called it “Dev.” Publish Profiles are typically set to be ignored in my .gitignore, so I forced it to be checked in.
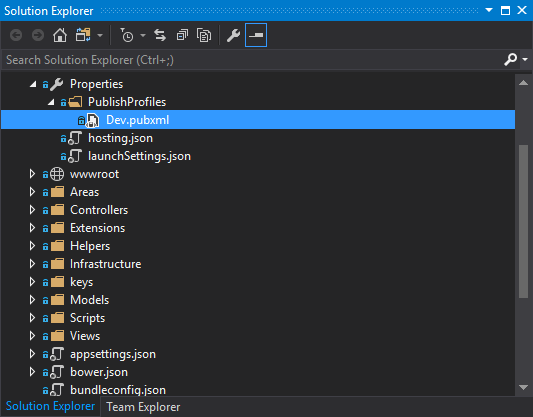
I removed all but the most essential portions of the profile in the first property group. My profile then looked like this:
<?xml version="1.0" encoding="utf-8"?>
<Project ToolsVersion="4.0" xmlns="http://schemas.microsoft.com/developer/msbuild/2003">
  <PropertyGroup>
    <WebPublishMethod>MSDeploy</WebPublishMethod>
    <LastUsedBuildConfiguration>Release</LastUsedBuildConfiguration>
    <LastUsedPlatform>Any CPU</LastUsedPlatform>
    <SiteUrlToLaunchAfterPublish />
    <LaunchSiteAfterPublish>True</LaunchSiteAfterPublish>
    <ExcludeApp_Data>False</ExcludeApp_Data>
    <MSDeployServiceURL>localhost</MSDeployServiceURL>
    <DeployIisAppPath>[MyWebAppName]</DeployIisAppPath>
    <RemoteSitePhysicalPath />
    <SkipExtraFilesOnServer>True</SkipExtraFilesOnServer>
    <MSDeployPublishMethod>WMSVC</MSDeployPublishMethod>
    <EnableMSDeployBackup>True</EnableMSDeployBackup>
    <UserName>[agent username]</UserName>
  </PropertyGroup>
</Project>
Why is the publish profile needed? It seems that msbuild cannot create a package without a profile.
I next added a build step in Team City that runs MSBuild.
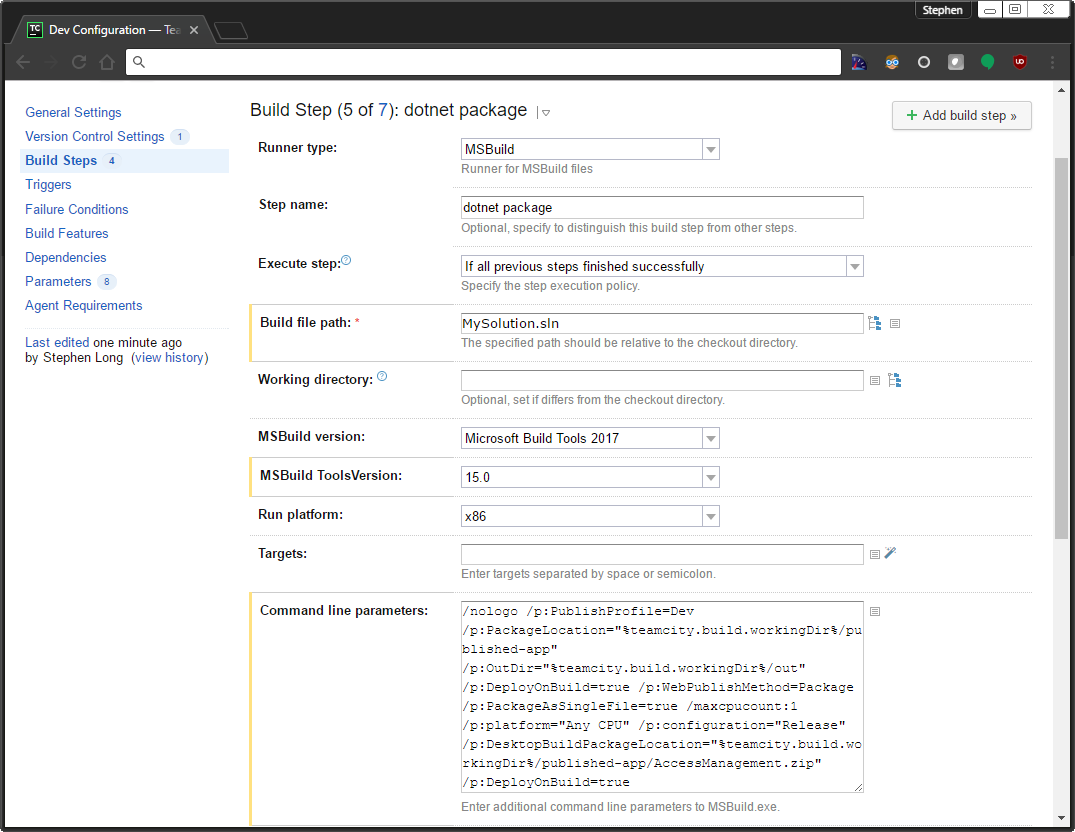
The command line parameters specify the packaging, the Publish Profile, and the output paths:
/nologo /p:PublishProfile=Dev /p:PackageLocation="%teamcity.build.workingDir%/published-app" /p:OutDir="%teamcity.build.workingDir%/out" /p:DeployOnBuild=true /p:WebPublishMethod=Package /p:PackageAsSingleFile=true /maxcpucount:1 /p:platform="Any CPU" /p:configuration="Release" /p:DesktopBuildPackageLocation="%teamcity.build.workingDir%/published-app/MySolution.zip" /p:DeployOnBuild=true
As long as we have a Team City parameter of “system.DeployIisAppPath,” the IIS Web Application Name will be used within the parameter file(s) that are generated in conjunction with the zip package. Initially, I kept trying to include the primary parameter file in my msdeploy switches, but found it was really unnecessary. The package itself will contain a parameters file.
Using msdeploy, our final build step will deploy the package to our web server.
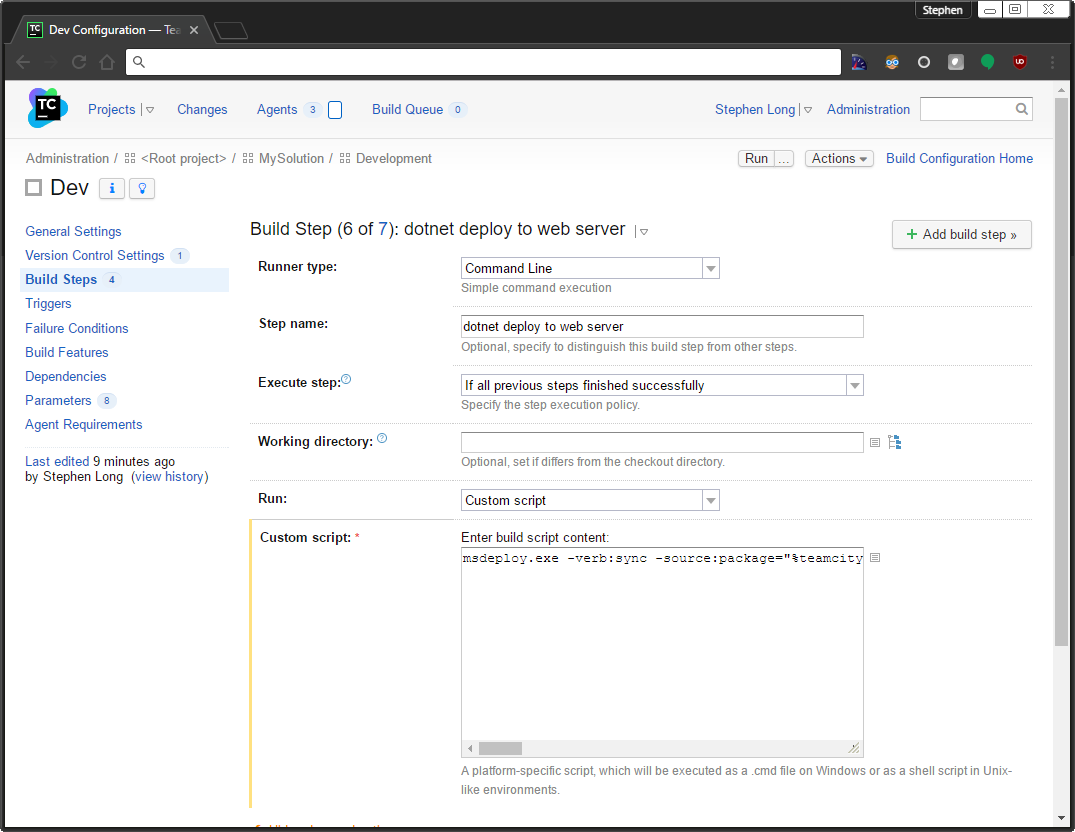
The full command that I used is below. Even though I didn’t really have to specify the “IIS Web Application Name,” I went ahead and added the setParam switch for posterity’s sake.
msdeploy.exe -verb:sync -source:package="%teamcity.build.workingDir%\published-app\MySolution.zip" -dest:auto,computerName=1.1.1.1,UserName='myuser',Password='password',includeAcls='False' -setParam:name='IIS Web Application Name',value='%system.DeployIisAppPath%' -enablerule:AppOffline -enableRule:DoNotDeleteRule -disableLink:AppPoolExtension -disableLink:ContentExtension -disableLink:CertificateExtension
With these build steps in Team City, I can build and deploy my .NET Core application continuous.