
It’s been a long, long time since I messed around with Google’s push notification messaging. In fact, the last time I played around with it, it was still called “C2DM,” or Cloud to Device Messaging. Since that time, “GCM,” or Google Cloud Messaging was introduced. And even that is superseded by Google’s new Firebase (FCM) messaging. The most recent iteration is very interesting since it’s cross-platform and directly supports iOS, Android, and Web notifications.
My side-project for the weekend was to get reaquainted with push notifications / messaging and do something useful with it. The initial concept I had in my mind was to create a mobile application to allow users to opt into (company) notifications, utilize my SSO server for identification of the user, and then actually transmit notifications to the user. Once I started looking at how Firebase works, these appeared to be attainable goals.
On a side note, why would I want to do these things? Well, it gets rid of things like email distribution groups, AD management, and other, imho, archaic methods of notifying/messaging individuals. Since the identity of the user is known, we can present them with notifications that are both personal AND since we know their claims-based roles, we can let them receive topic-driven notifications.
As I said, Firebase is cross-platform. My first pass at utilizing it, though, is via Android Studio and the Android emulator.
Diving right in, I utilize a test Google account for development work. In order to use Firebase, a project has to be created under whatever account will be used. Google’s set-up process is pretty painless. Here are the steps I went through initially.
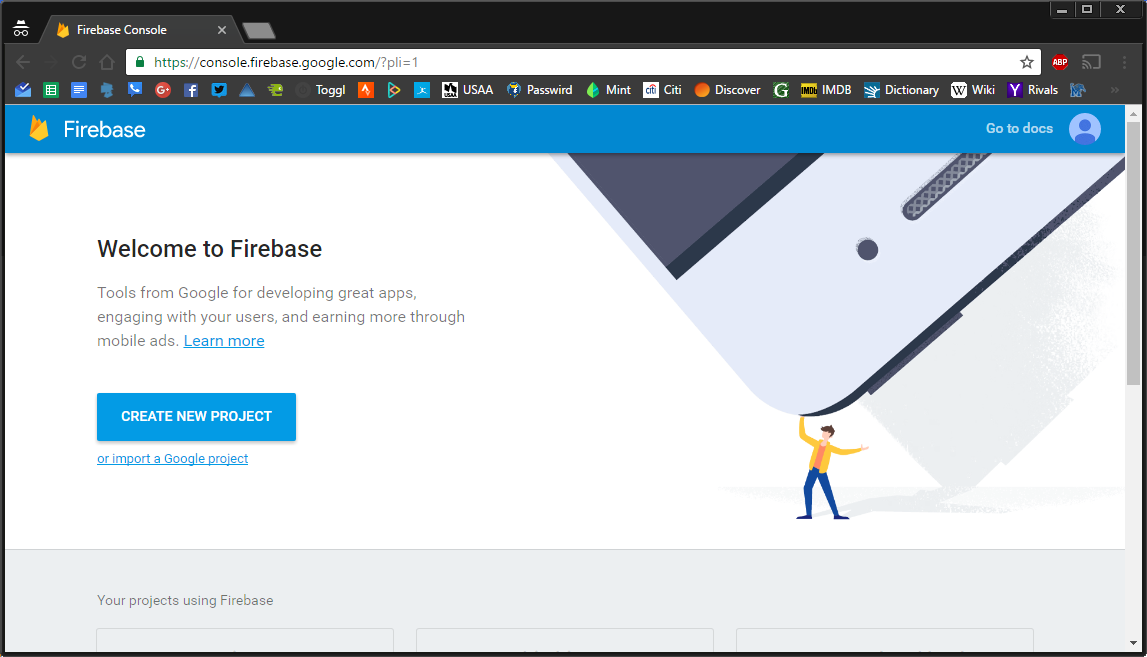
I added Firebase to an existing Google project:

After creating (or adding to) a project:

Clicking the “credentials” button, we can create an API key:

That’s it for the remote setup. You will also, for an Android app, need to go to the project settings and download “google-services.json.” This will contain all of the API key information that you can bring into your Android Studio project.
So, I jumped right into Android studio and created a few activities, services, and various classes.
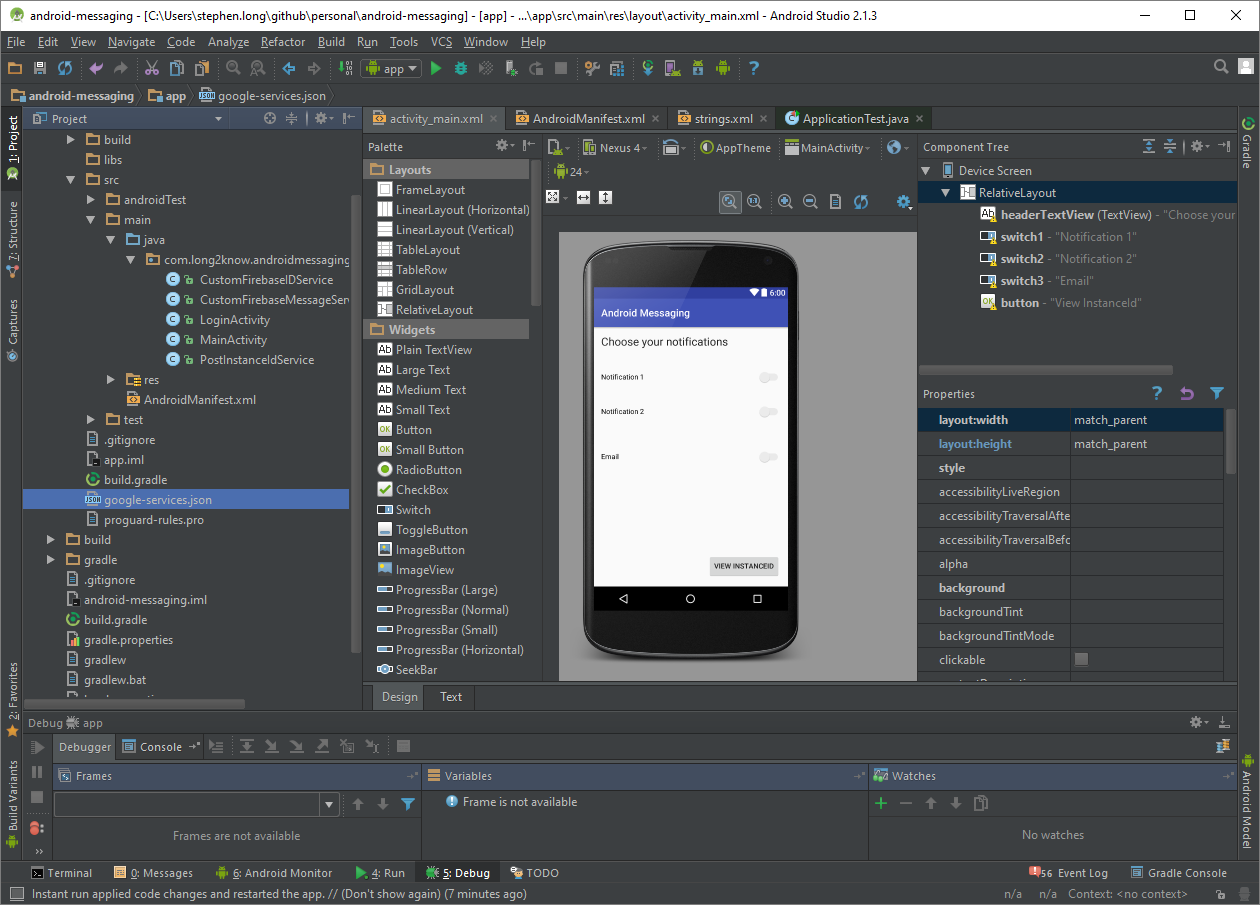
You can see that I dragged/dropped the “google-services.json” file right into my project.
The premise for how push notifications will work is that an “InstanceID” is provided for the device. The InstanceID can be used to subscribe to topics. It’s synonymous with a a bearer token in that once your service has the InstanceID, messages can be sent directly to that device. If the InstanceID has been used to subscribe to a topic/group, then that is managed by sending a message through Firebase’s delivery system based on the topic/group. Google provides this nice sequence diagram of the workflow:
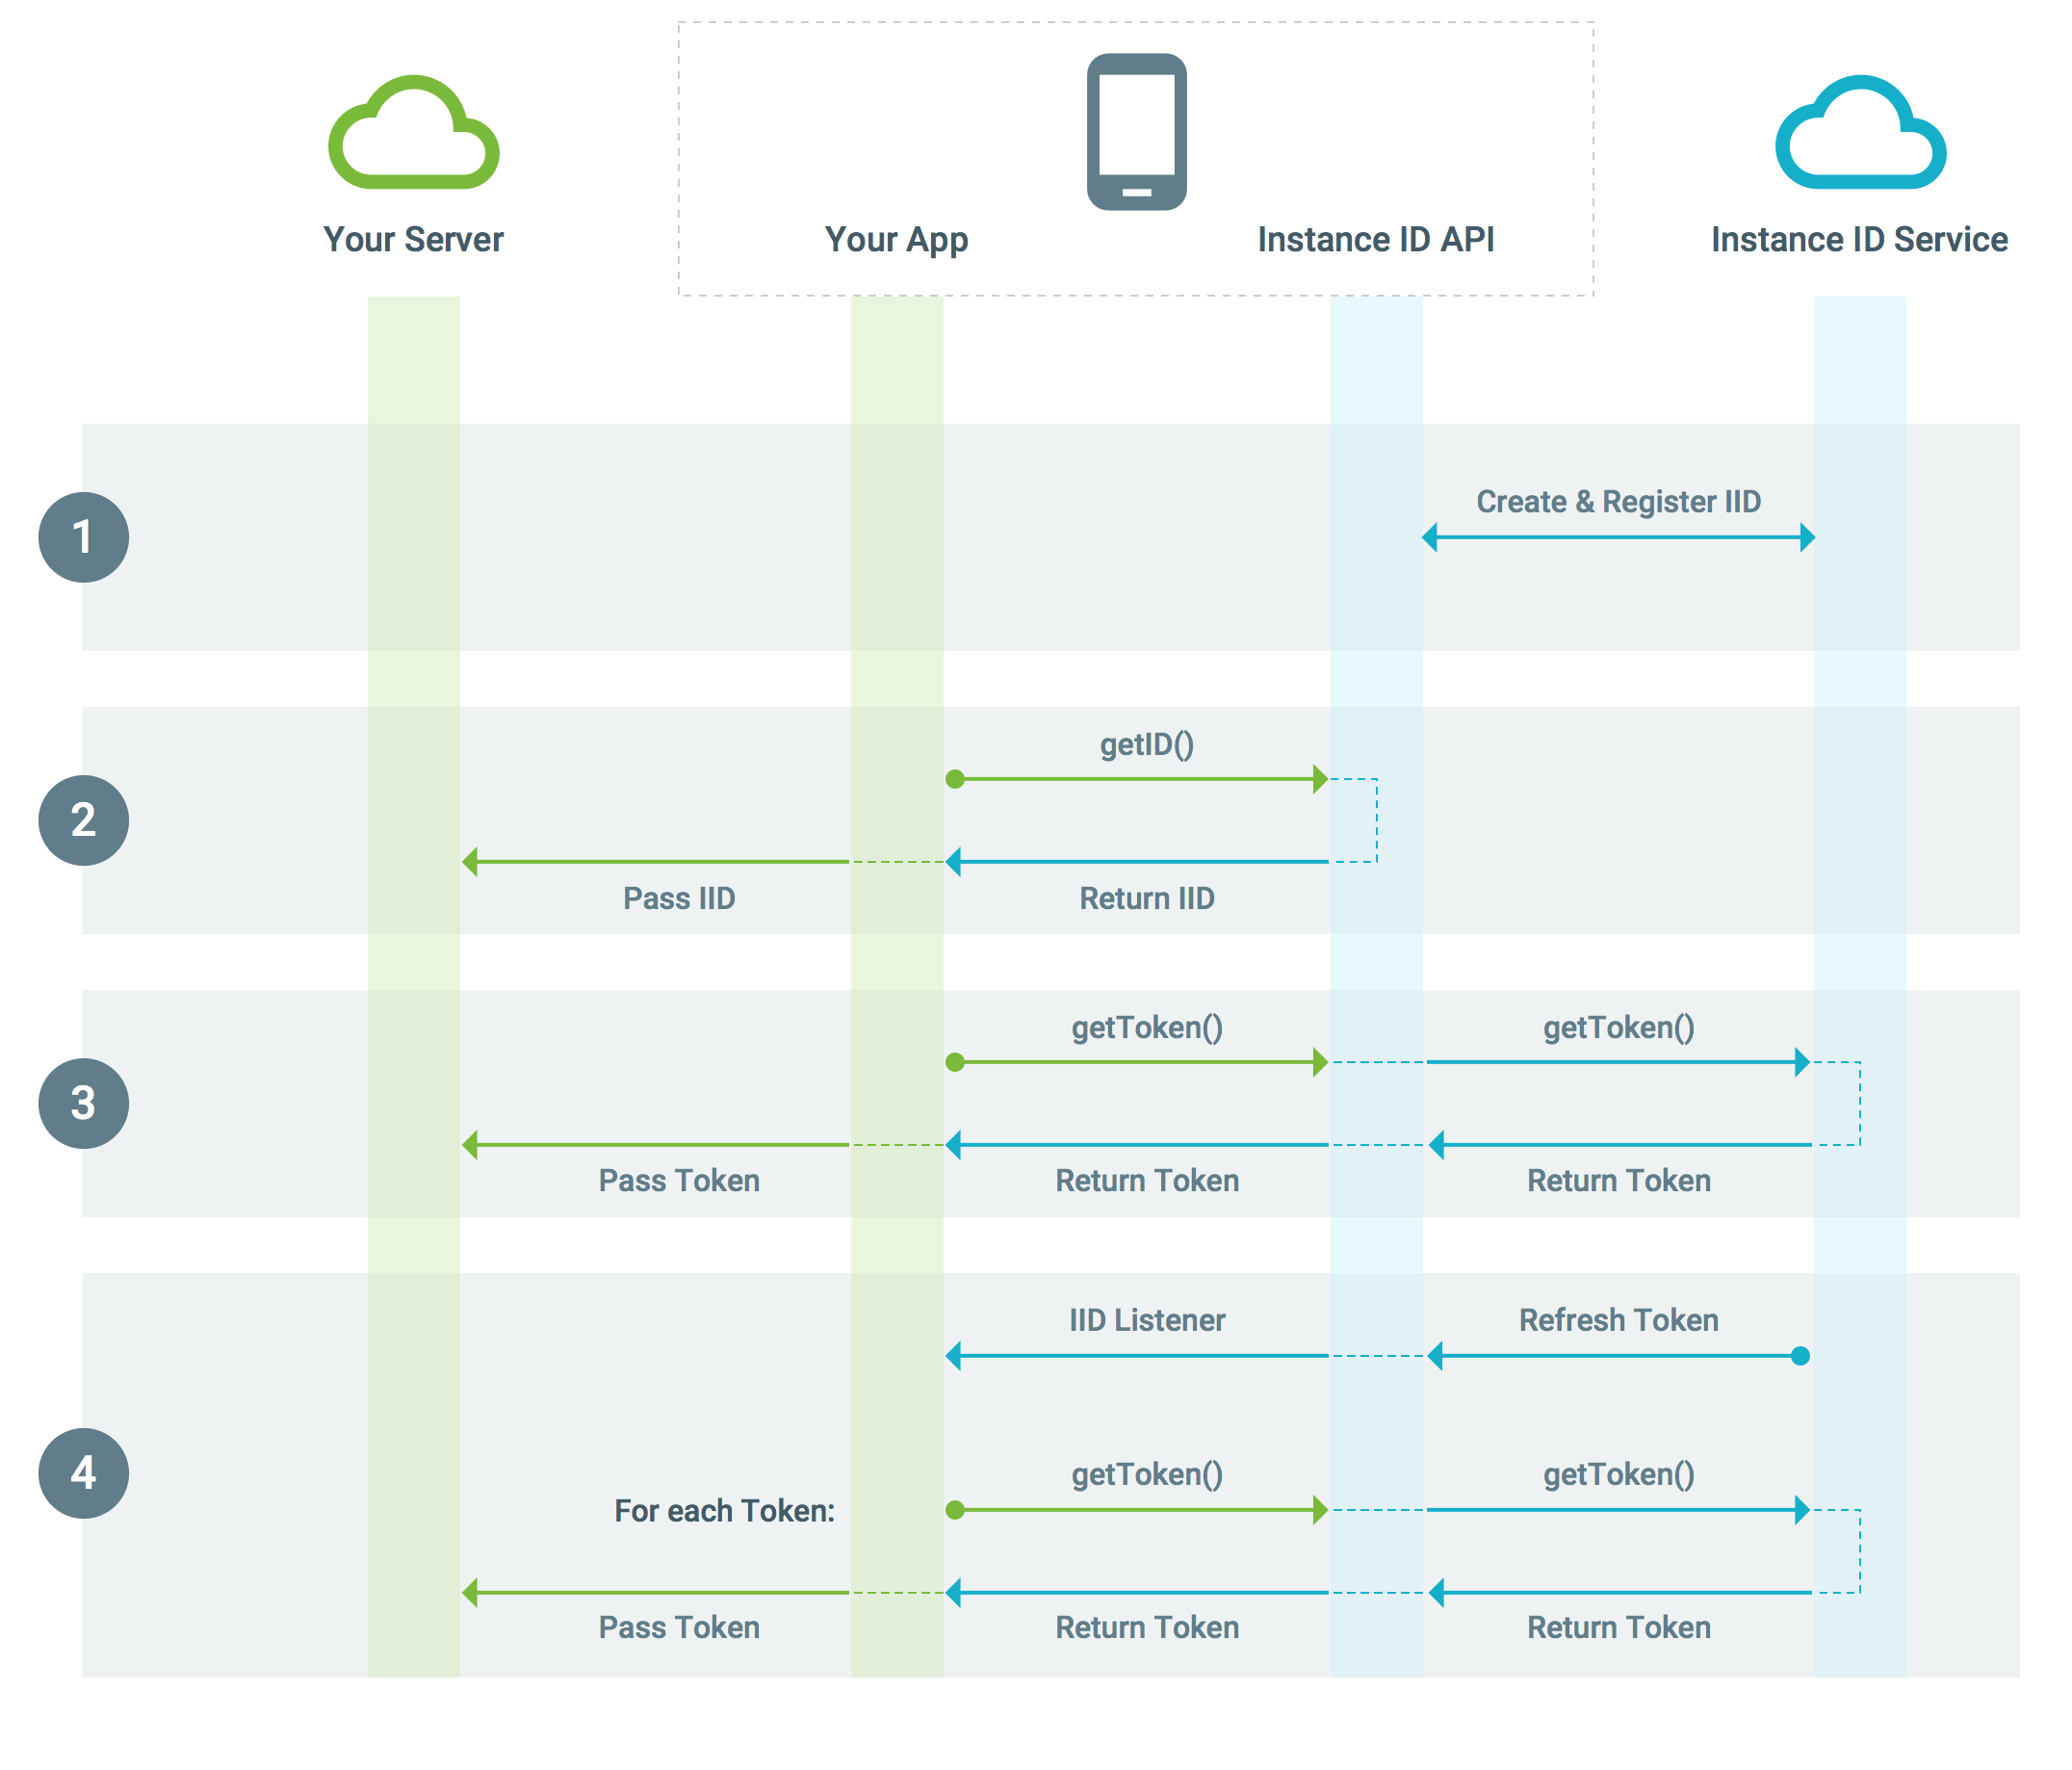
In my case, since I am tying into my own security backend, I am following the flow of logging in the through OAuth to my SSO Site via a WebView, and then as the user gets a new InstanceID (since the InstanceID can change based on various factors), I am recording that ID on a per user basis. This provides a means to provide individually tailored notifications beyond the topic/group subscriptions. Imagine, let’s say, that I want to send a specific user a notification because they received a bonus, have a paycheck available, or something else of that nature.
For the Android piece, I won’t bore you with my “LoginActivity,” that provides OAuth login via a Webview, since it’s pretty rudimentary, but the pieces to get the FCM messaging working are interesting and actually pretty small.
In the build.gradle app-module file, we need to set dependencies on the Firebase libraries:
dependencies {
    compile fileTree(dir: 'libs', include: ['*.jar'])
    testCompile 'junit:junit:4.12'
    compile 'com.android.support:appcompat-v7:24.2.1'
    compile 'com.google.firebase:firebase-core:9.4.0'
    compile 'com.google.firebase:firebase-messaging:9.4.0'
    compile 'com.google.android.gms:play-services-appindexing:9.4.0'
}
In the application manifiest, we have to tell Android to listen for the intents provided by the Firebase Message service and InstanceID service. Typically, you will have your own implementation/inherited classes that listen for these intents. You can see I prefixed mine with the “Custom” moniker.
<!-- Define our services that handle the Firebase events! -->
<service android:name=".CustomFirebaseMessageService">
    <intent-filter>
        <action android:name="com.google.firebase.MESSAGING_EVENT"/>
    </intent-filter>
</service>
<service android:name=".CustomFirebaseIDService">
    <intent-filter>
        <action android:name="com.google.firebase.INSTANCE_ID_EVENT"/>
    </intent-filter>
</service>
The implementation to listen for, and log, InstanceID changes is below. I have my own service called “PostInstanceIdService” which attach the OAuth Bearer token to a POST request and send the InstanceID to my own server. That’s really all there is to it since the Firebase classes already do all of the heavy lifting.
public class CustomFirebaseIDService extends FirebaseInstanceIdService {

    private static final String TAG = "CustomFirebaseIDService";
    private PostInstanceIdService _svc;

    public CustomFirebaseIDService() {
        _svc = new PostInstanceIdService();
    }

    @Override
    public void onTokenRefresh() {
        // Get updated InstanceID token.
        String refreshedToken = FirebaseInstanceId.getInstance().getToken();
        Log.d(TAG, "Token: " + refreshedToken);
        sendTokenToServer(refreshedToken);
    }

    private void sendTokenToServer(String token) {
        Context context = getApplicationContext();
        String bearerToken = context.getSharedPreferences("oauth_tokens", 0).getString("access_token", "");
        _svc.PostId(bearerToken, token);
    }
}
The other intents we want to handle are those that deal with receiving notifications. This is also a fairly rudimentary bit of code. Eventually, I’ll have this running as a background service to be more useful.
public class CustomFirebaseMessageService extends FirebaseMessagingService {

    private static final String TAG = "CustomFirebaseMessageService";

    @Override
    public void onMessageReceived(RemoteMessage remoteMessage) {

        // Check if message contains a notification payload.
        if (remoteMessage.getNotification() != null) {
            sendNotification(remoteMessage.getNotification().getBody());
        }
    }

    private void sendNotification(String messageBody) {
        Intent intent = new Intent(this, MainActivity.class);
        intent.addFlags(Intent.FLAG_ACTIVITY_CLEAR_TOP);
        PendingIntent pendingIntent = PendingIntent.getActivity(this, 0 /* Request code */, intent,
                PendingIntent.FLAG_ONE_SHOT);

        Uri defaultSoundUri = RingtoneManager.getDefaultUri(RingtoneManager.TYPE_NOTIFICATION);
        NotificationCompat.Builder notificationBuilder = new NotificationCompat.Builder(this)
                .setSmallIcon(R.drawable.ic_long2know)
                .setContentTitle("Notification")
                .setContentText(messageBody)
                .setAutoCancel(true)
                .setSound(defaultSoundUri)
                .setContentIntent(pendingIntent);

        NotificationManager notificationManager = (NotificationManager) getSystemService(Context.NOTIFICATION_SERVICE);
        notificationManager.notify(0 /* ID of notification */, notificationBuilder.build());
    }
}
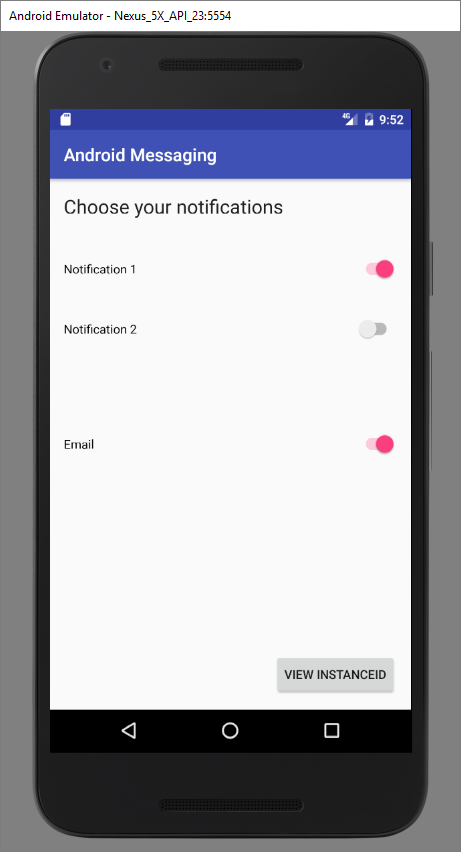
For the UI, I have a simple set of (3) switches that will let the user subscribe or unsubscribe to topics. Since these subscriptions are managed by Firebase itself, I didn’t see a need to mess with them much. My MainActivity is also pretty simplistic. The important parts are the calls to the Firebase subscribe/unsubscribe methods:
_switch1 = (Switch) findViewById(R.id.switch1);
_switch1.setOnCheckedChangeListener(new CompoundButton.OnCheckedChangeListener() {
    public void onCheckedChanged(CompoundButton buttonView, boolean isChecked) {
        if (isChecked) {
            FirebaseMessaging.getInstance().subscribeToTopic("switch1");
            Toast.makeText(MainActivity.this, "Subscribed to 1", Toast.LENGTH_SHORT).show();
        } else {
            FirebaseMessaging.getInstance().unsubscribeFromTopic("switch1");
        }
    }
});
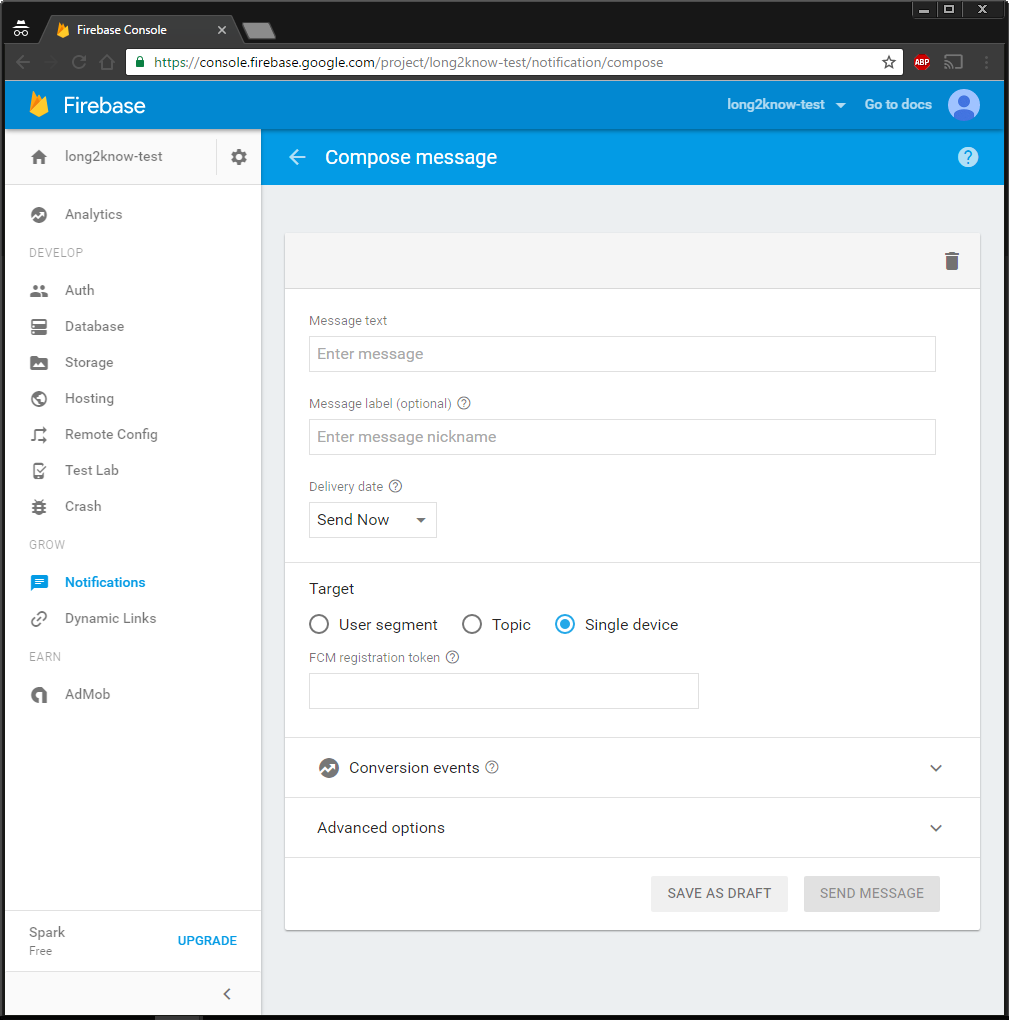
With the project building and running in the Android emulator, I can use the Firebase console to send messages.
First, the user logs in:
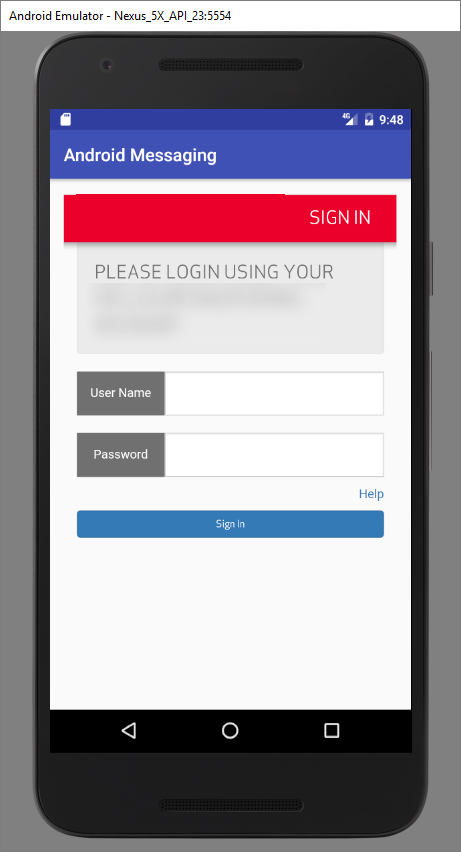
After logging in, they see the sliders/button:
I can pop into the Firebase console and send a specific message based on InstanceID:
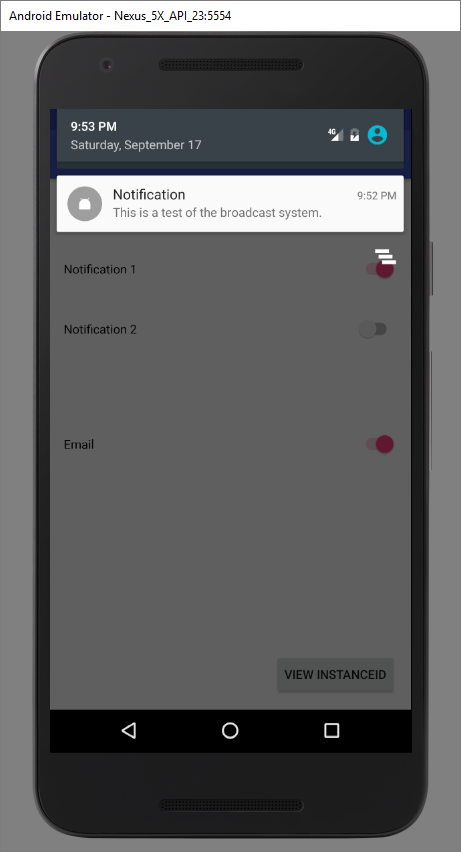
And then I can see the notification, as expected, in the notification area on the emulator:
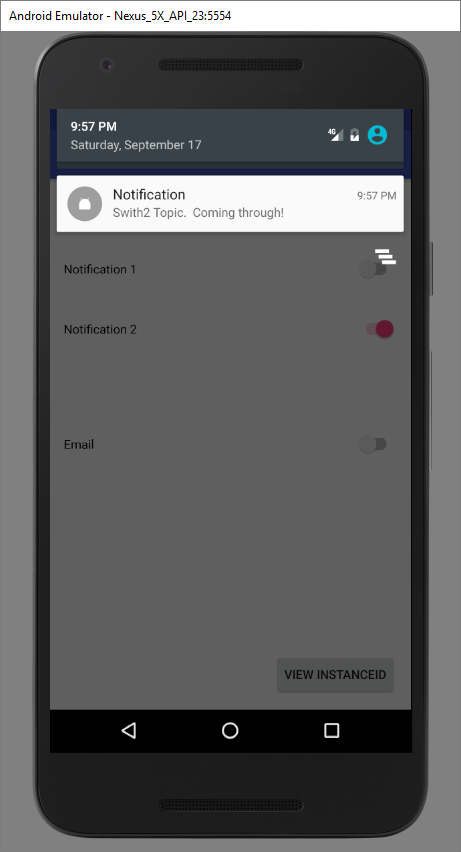
The subscriptions based on topic work well too. You can see that I enabled the topic “Switch2” and sent a notification, by topic, from the Firebase console:
And there you have it. With a relatively minimal amount of work .. well, the security piece actually took me a while to get right .. it’s pretty easy to create a managed topic/message distribution system.